Never, ever did I think that one day I’d learn to make my own table olives, especially in Spain where they are available almost everywhere. Truth is, the process is incredibly easy… just takes a bit of time & patience. And experimenting with different final flavors makes it all worthwhile. Let’s see how it’s done.

Before we dive into the process, all steps outlined below are my personal experience & based on an amalgam of many different videos available online. One clip that stood out among the rest was from a YouTube cooking channel. Guille Rodríguez is entertaining & I’ve made a couple of his recipes that turned out well, so I decided to focus on his method.
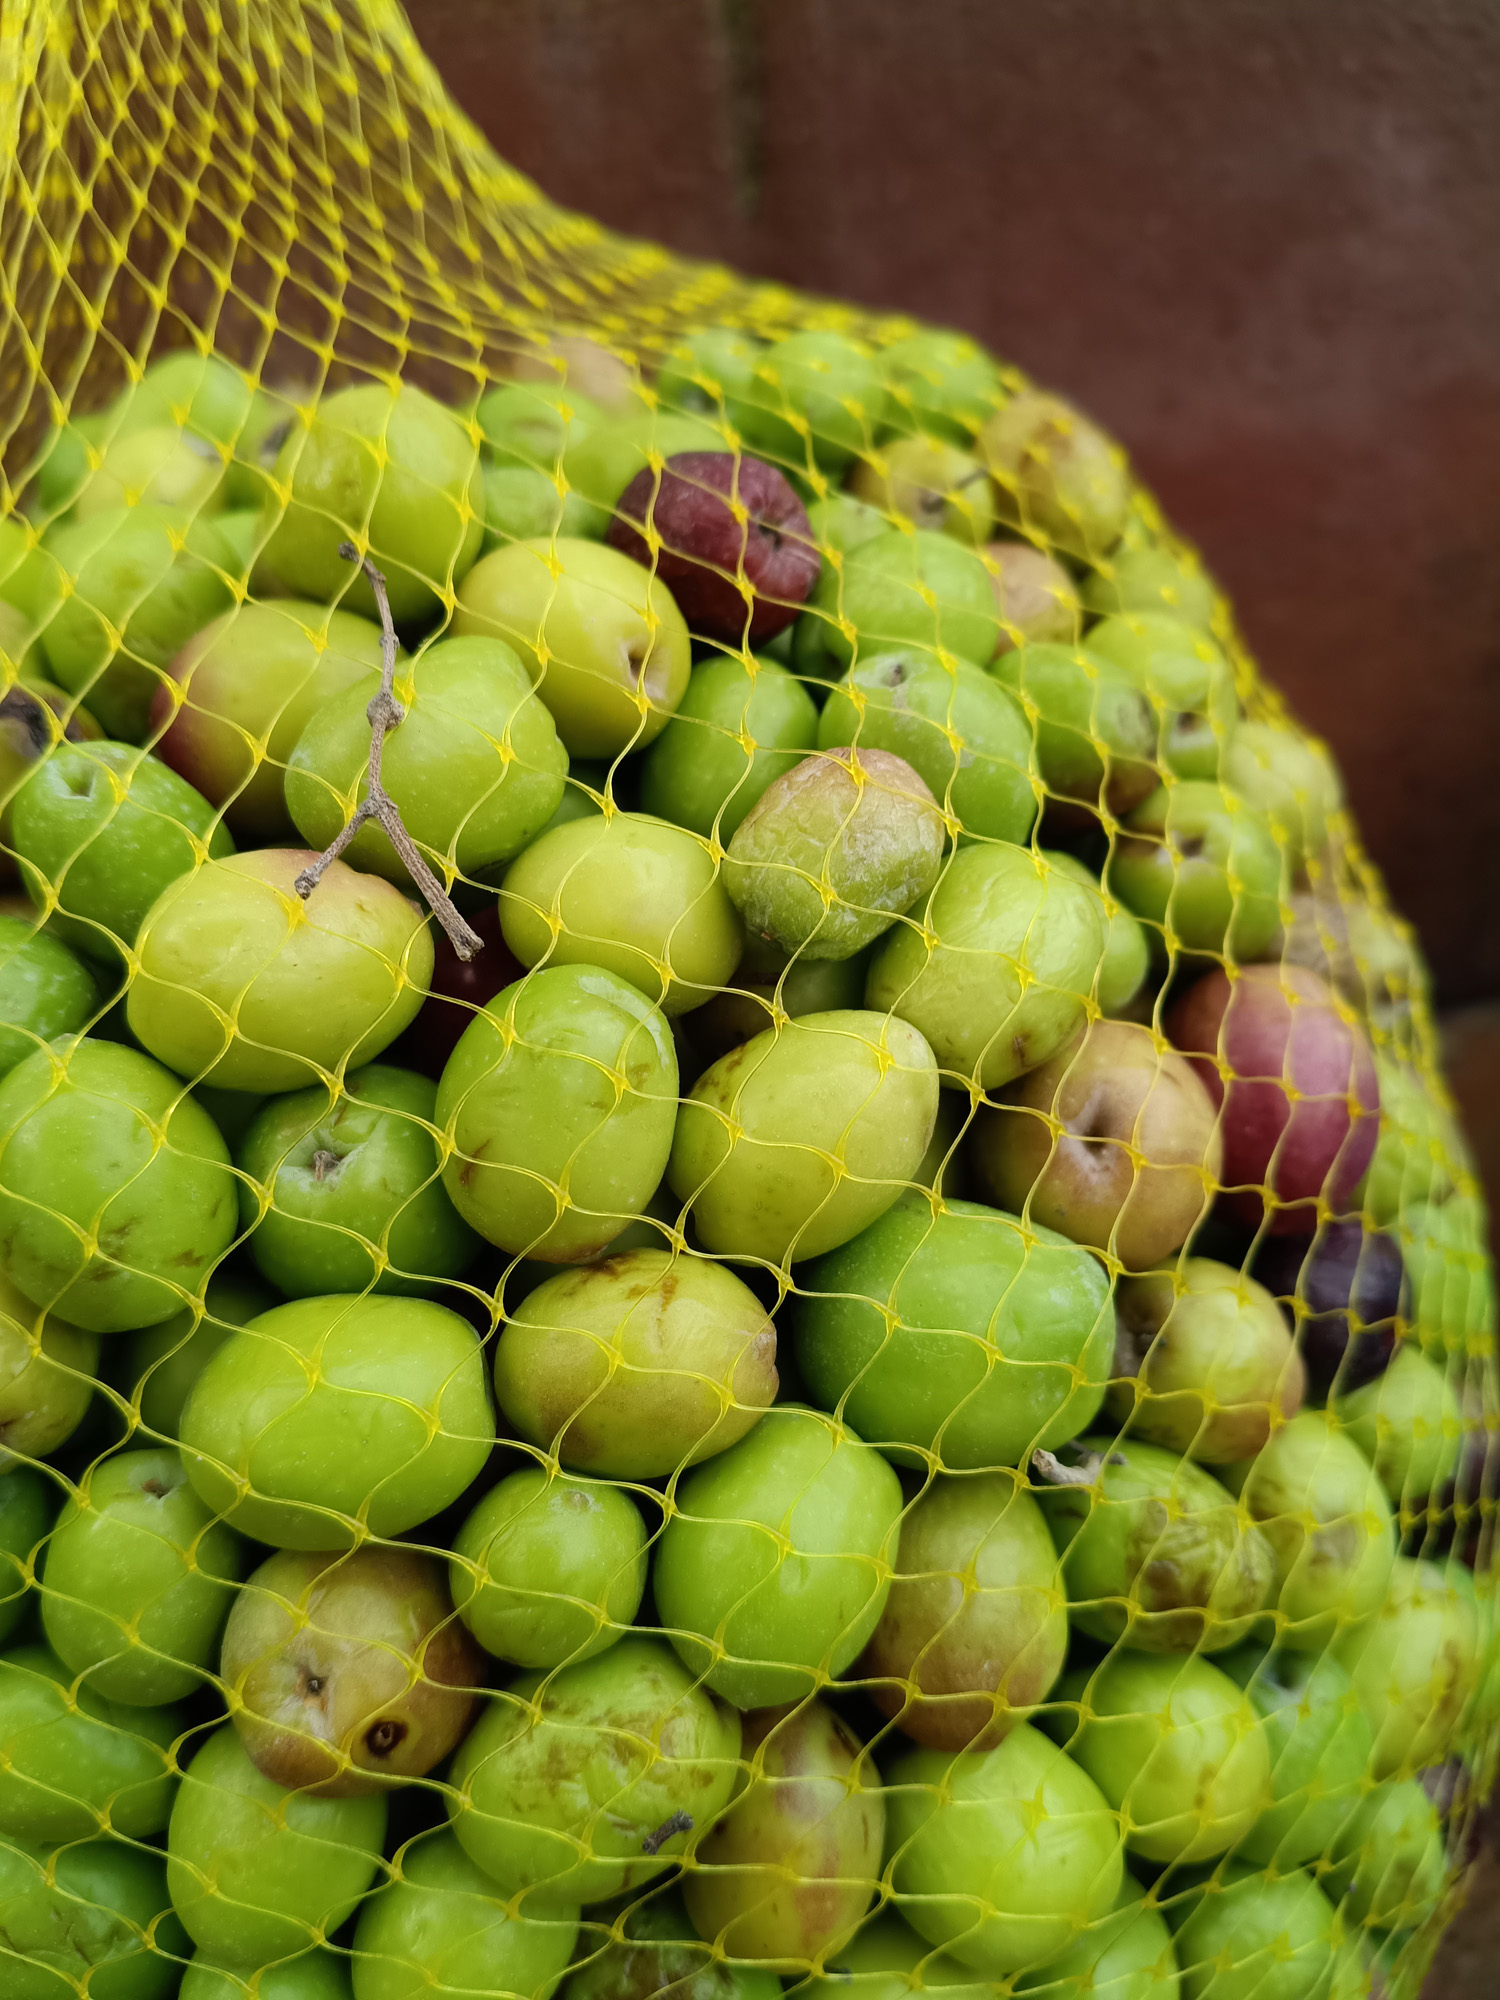
Also, I’ve done this two different years with two different types of olives. In 2022 while at the Triana market, Rafa found 1 kilo of gordal olives —a Sevilla variety that’s as big & plump as its name implies— & suddenly I had a project! Then in November 2025, I found 2 kilos of recently-picked manzanilla olives at the wonderfully named restaurant/rest stop Cuatro Mojones —a rural venta whose name is “Four Milestones” in English but in slang also “Four Cowpiles”— near Villamartín in Cádiz province.
Photos show both varieties since the process is exactly the same. Ready for some home-made table olives?
Aceitunas de mesa
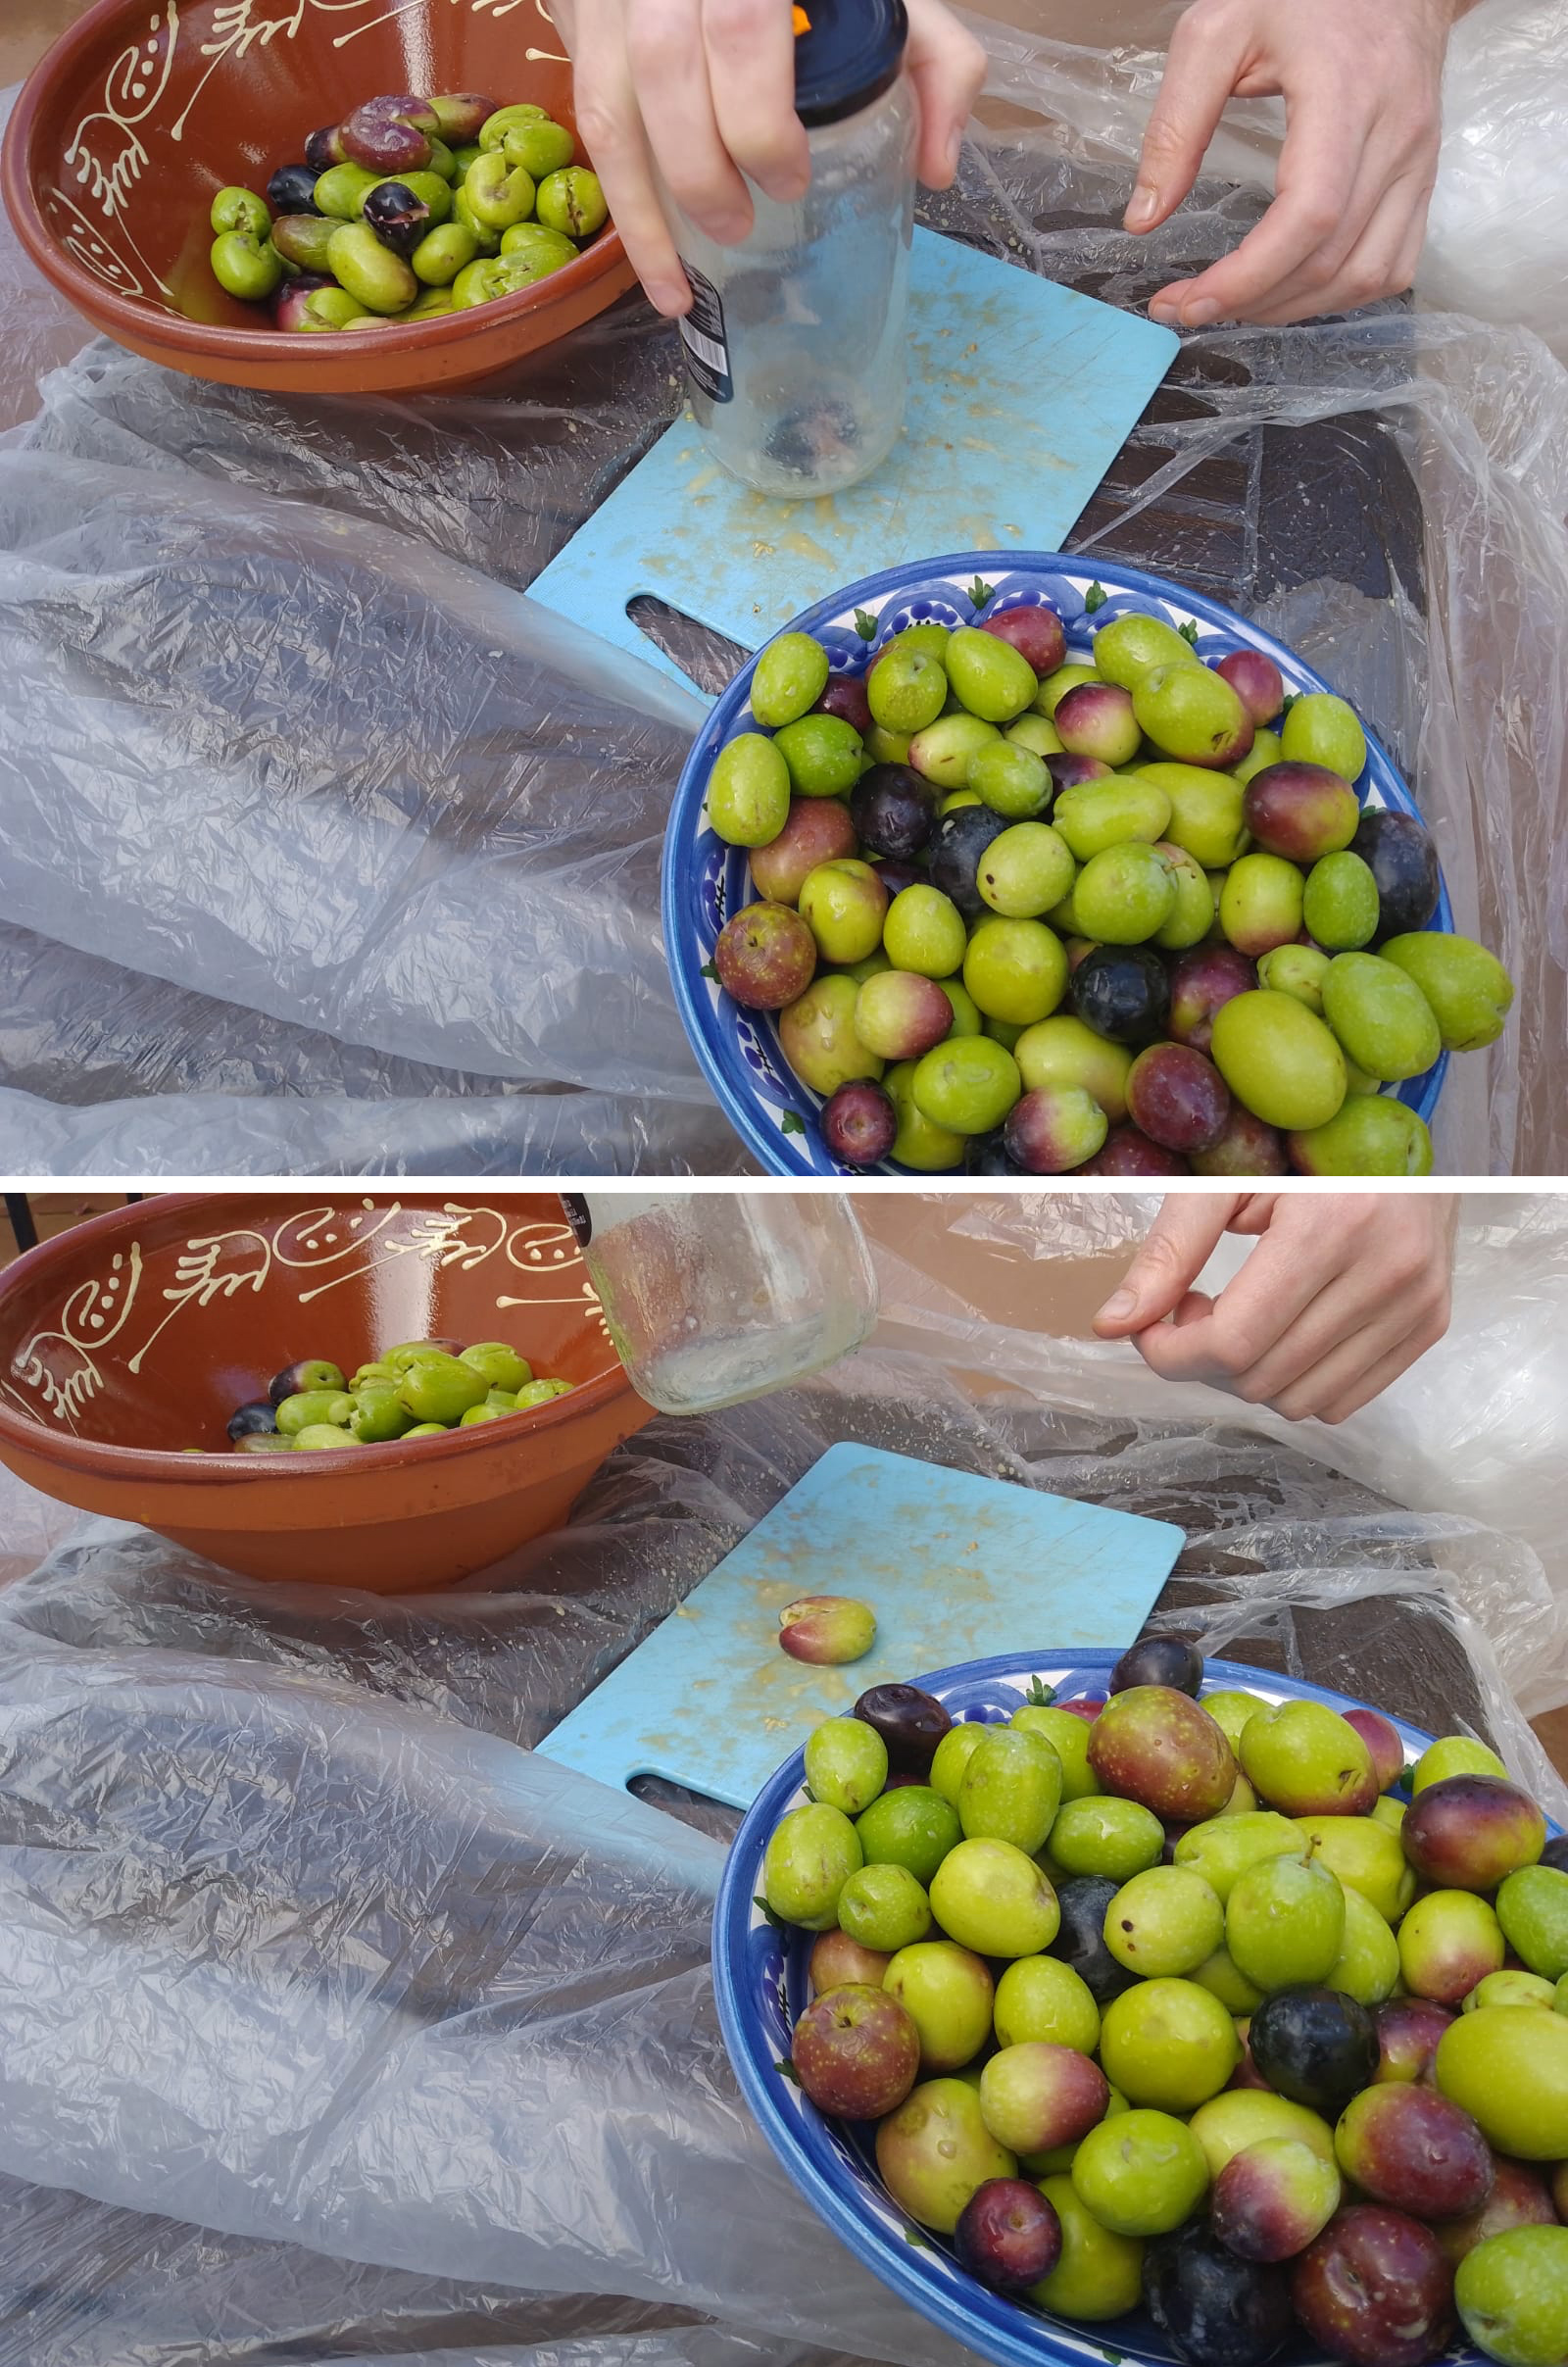
Step 1: If you’ve ever been pranked (like me!) into eating an olive straight from the tree, that’s a flavor you won’t soon forget. I wonder who discovered that the intense bitterness of olive fruit disappears with constant soaking & washing. Genius. But before that happens, water has to penetrate the fruit & that’s usually by making an incision in each & every olive.
You can imagine how time-consuming slicing endless kilos of olives would be, so a variety of contraptions have been invented to speed up this initial step. One of the most simplest is two small pieces of wood: place an olive in between, tap down lightly with a hammer & the olive breaks open. Alternatively, take the concave bottom of a thick, glass jar & smash away. Aceitunas partidas can be messy, so definitely wear gloves (unlike me!) & cover your work surface!

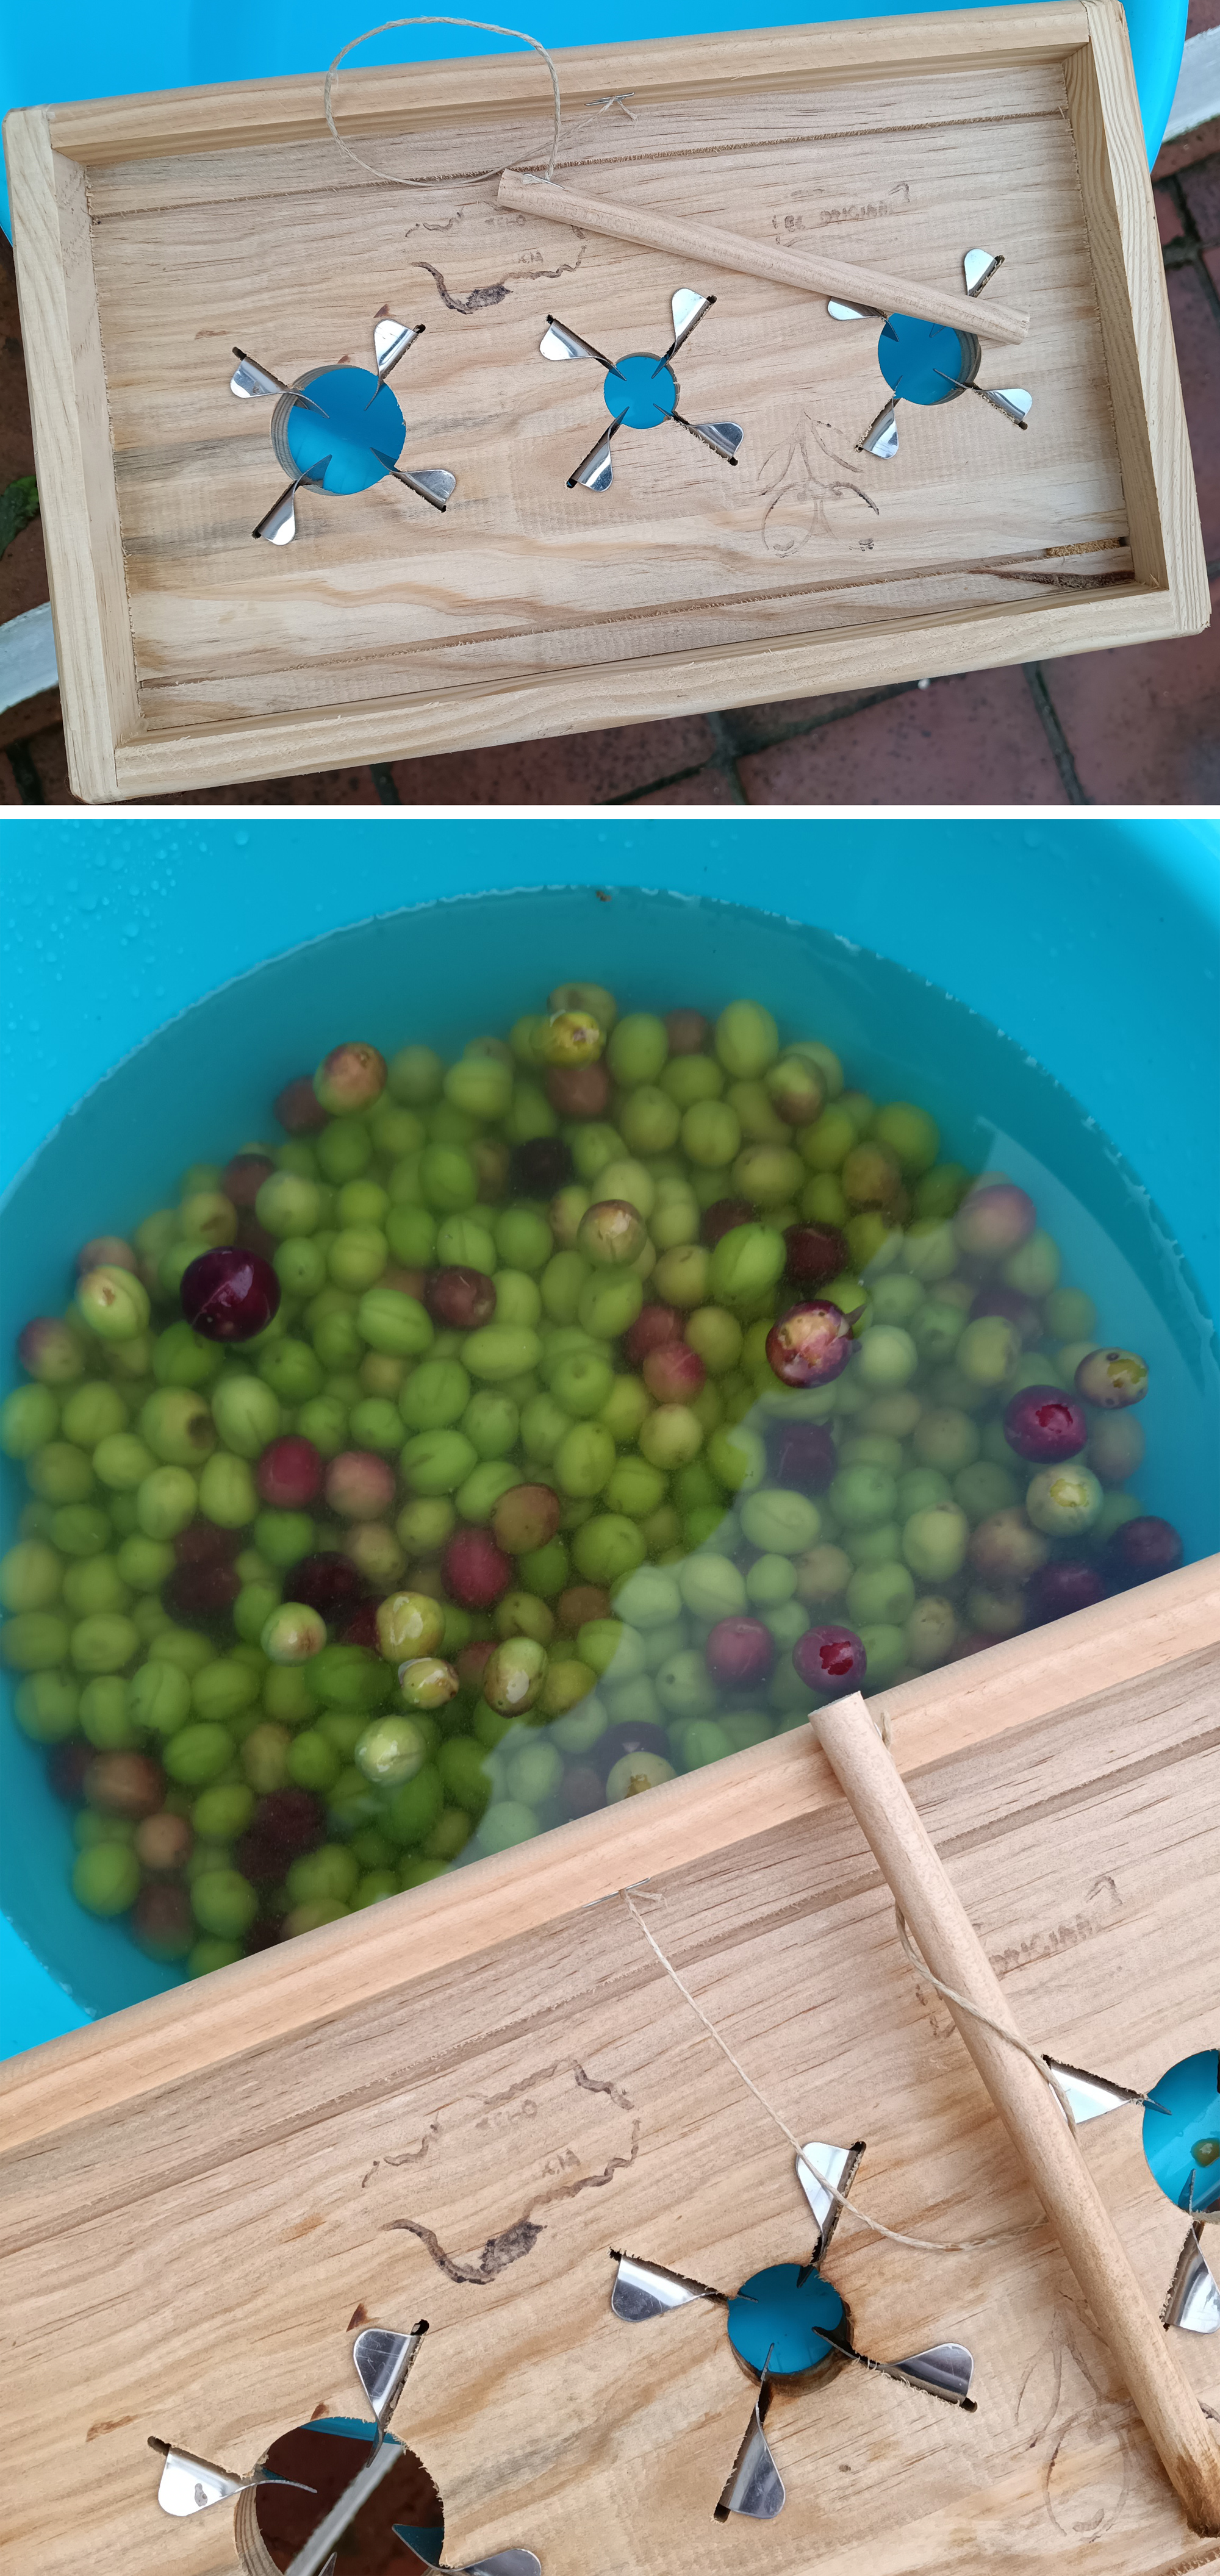
Larger devices for bigger production use a pulling mechanism to split the olive open before falling into a bin or container below. However for smaller quantities at home, a clever tabla can be found at most local hardware stores… it contains holes for different sizes of olives, each lined with sharp metal blades & a wooden dowel to push each olive through. Don’t be tempted to use your fingers!
●
●
●
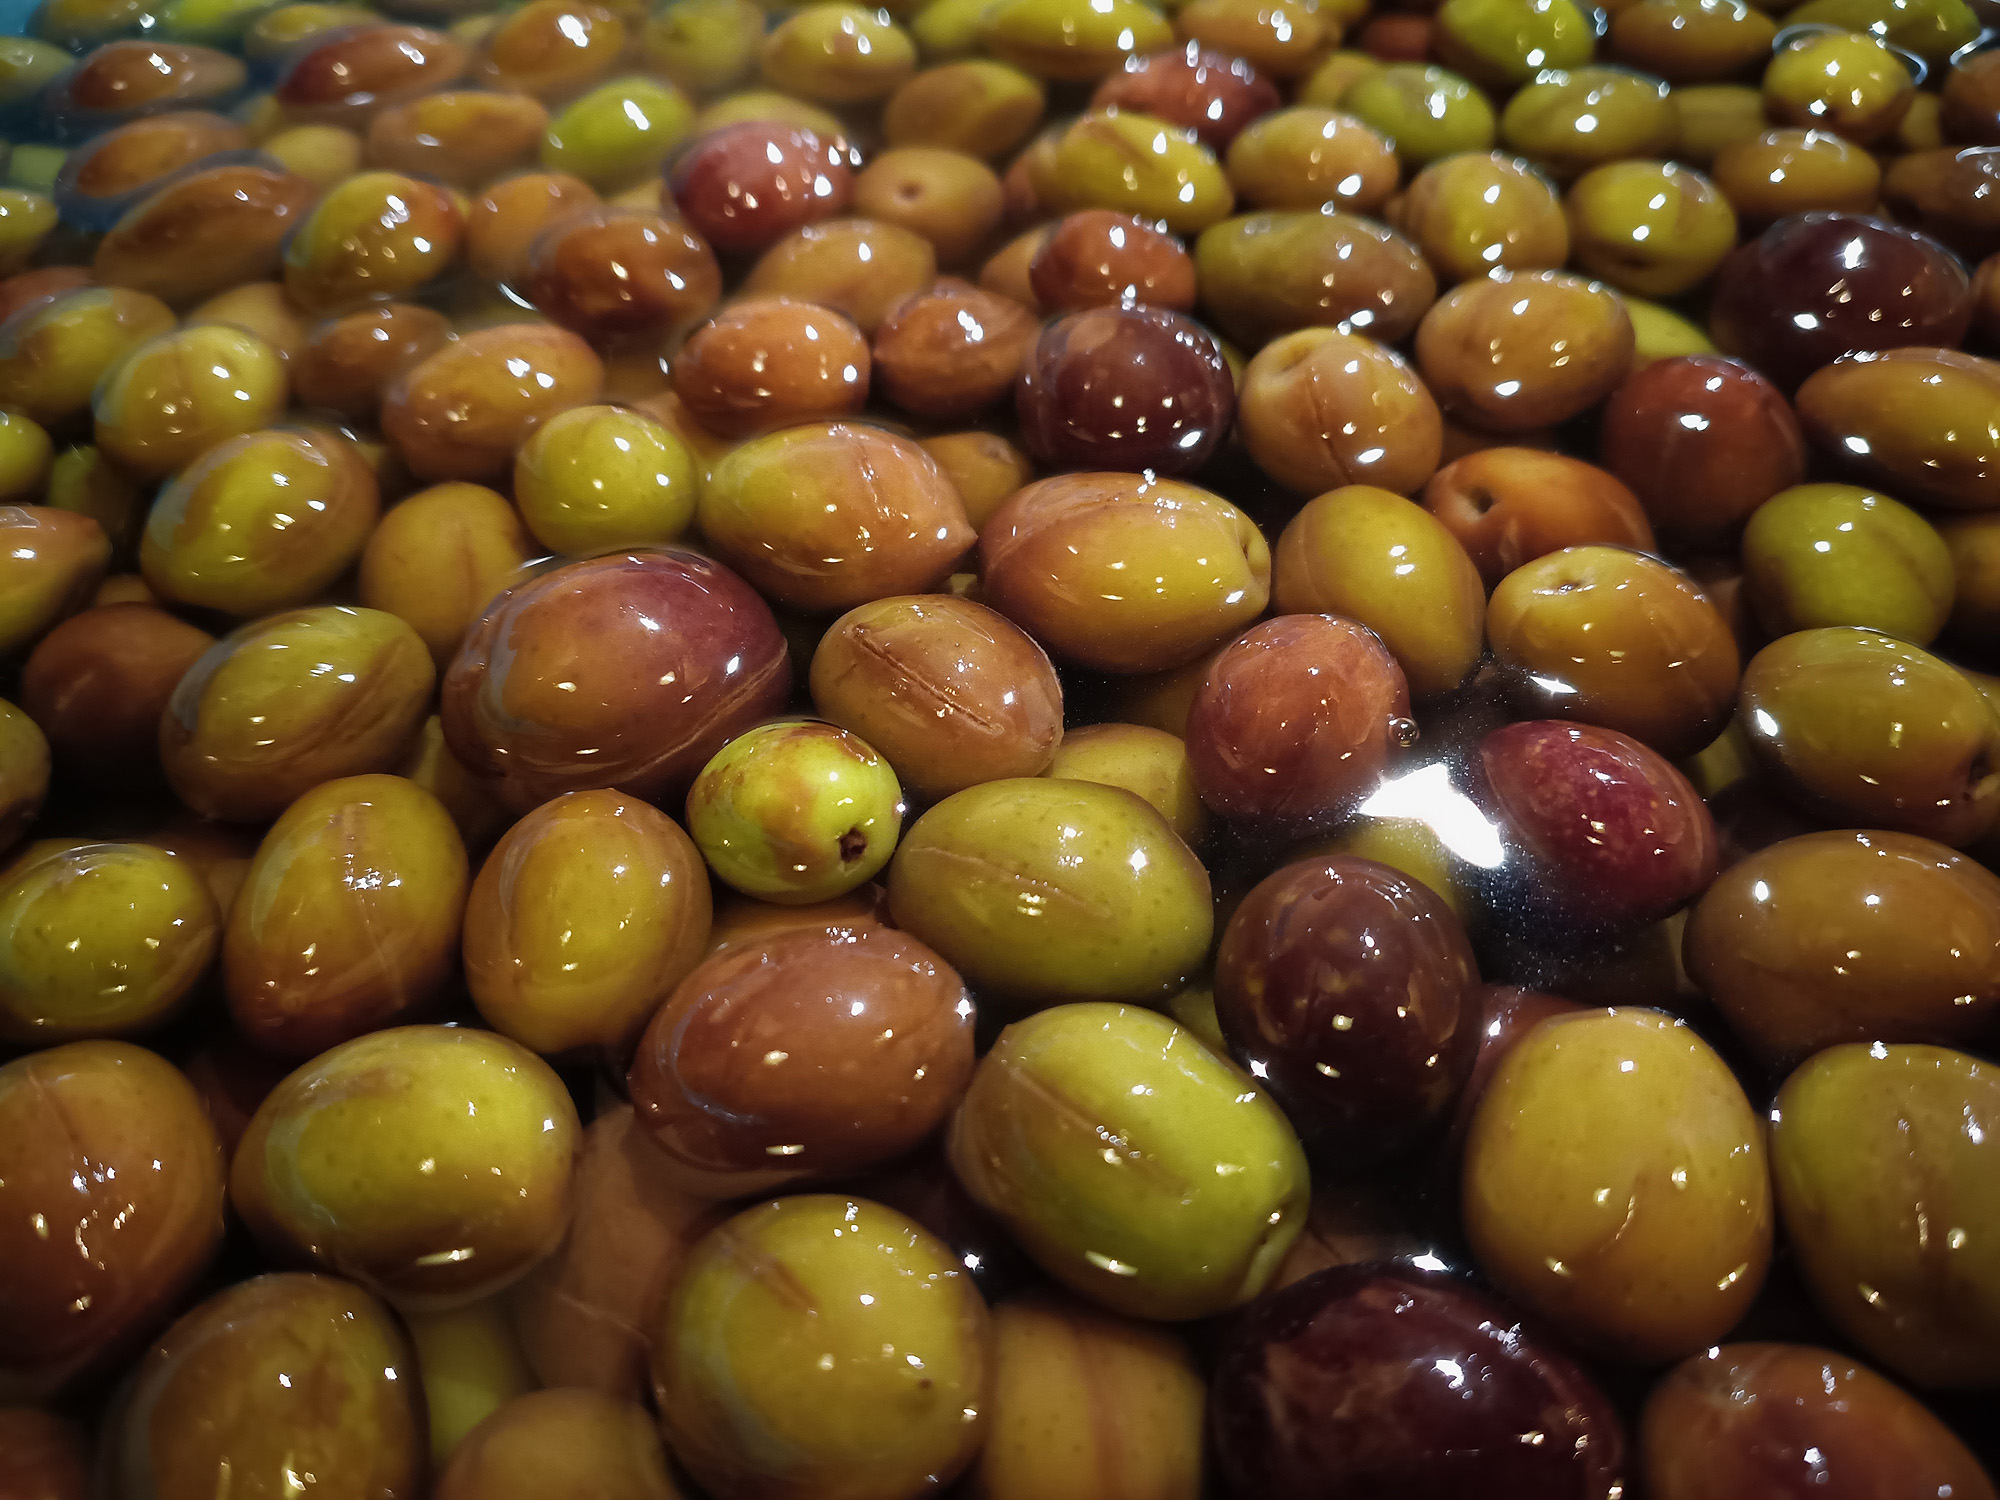
Step 2: Whatever method used for opening the olive, next comes washing & leeching out all that bitterness. Use mineral water because added chemicals from tap water (chlorine & other disinfectants) don’t taste great in olives. This step is where I found the most variation… perhaps due to the varietal of olive, perhaps from personal preference. Guille recommends changing the water every day for a little under two weeks until it stays clear. Others suggest changing water twice daily for about a week. In the end, you have to adjust to what your own olives do.
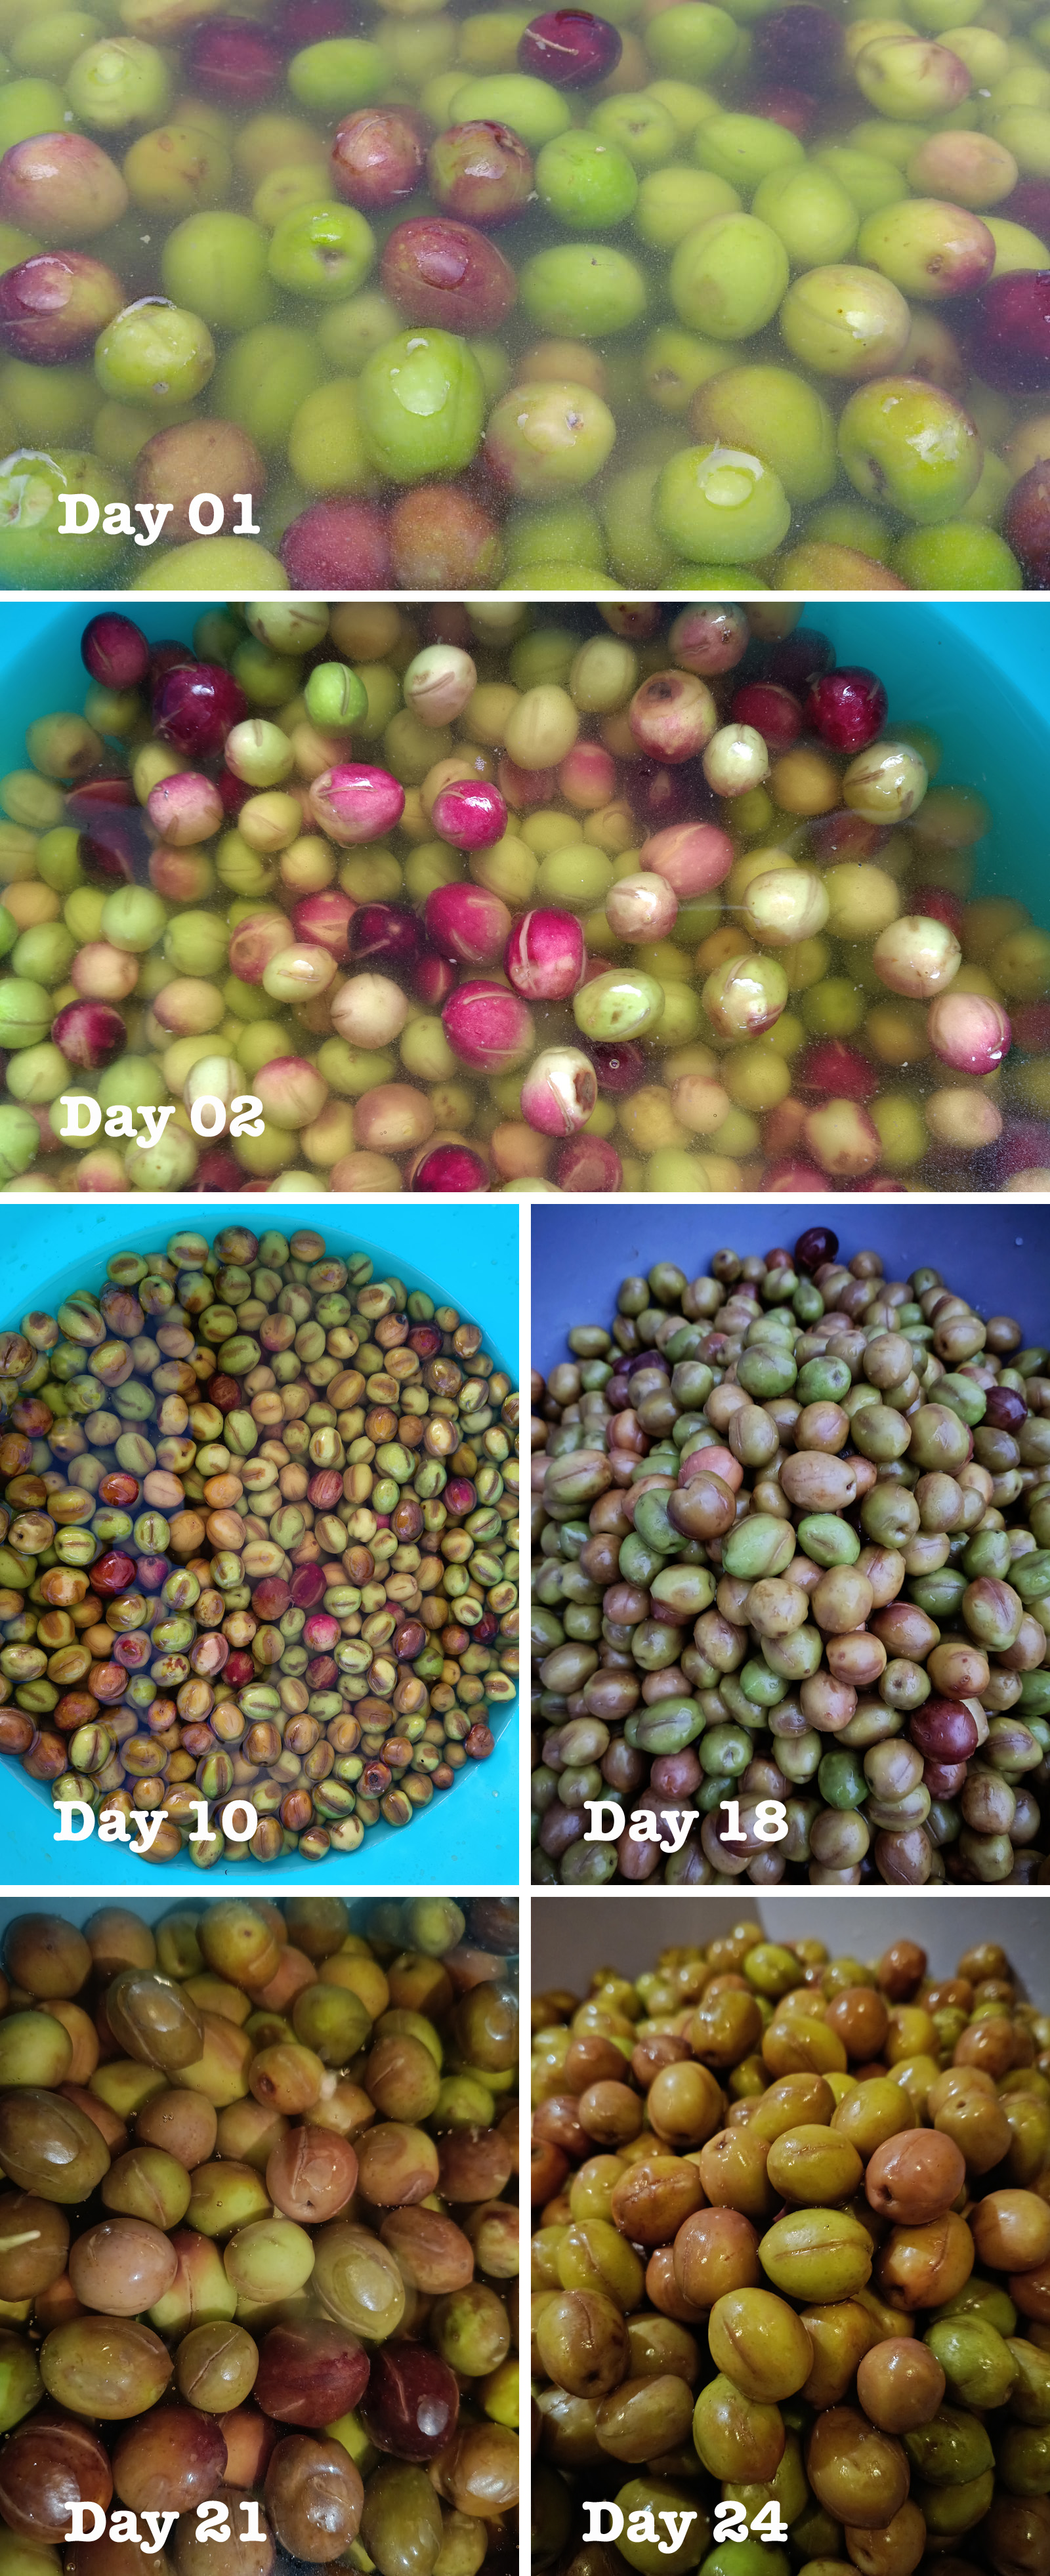
Note that oxidation at this stage is normal. As olives are exposed to water & air, they lose that bright green color & turn darker… basically into an olive green 😉 And the best way to know if they’re ready for the next step is a taste test. At this point, they shouldn’t be bitter in the least.
You might notice from the dates above that between Thanksgiving & prepping for Christmas, there were days I didn’t change the water. No big deal. From experience, I’d say that the entire process is very forgiving.
●
●
●
Step 3: Time for brine! Kosher or coarse salt works best here & quite a bit of it. The salmuera, or brining solution, is about 80 g of salt per liter of tepid mineral water. But no need to measure because there’s an easy trick to know when you’ve added enough salt: if a clean egg floats, you’re good to go! Change the brine with the same concentration of salt every day for three days before continuing.
●
●
●
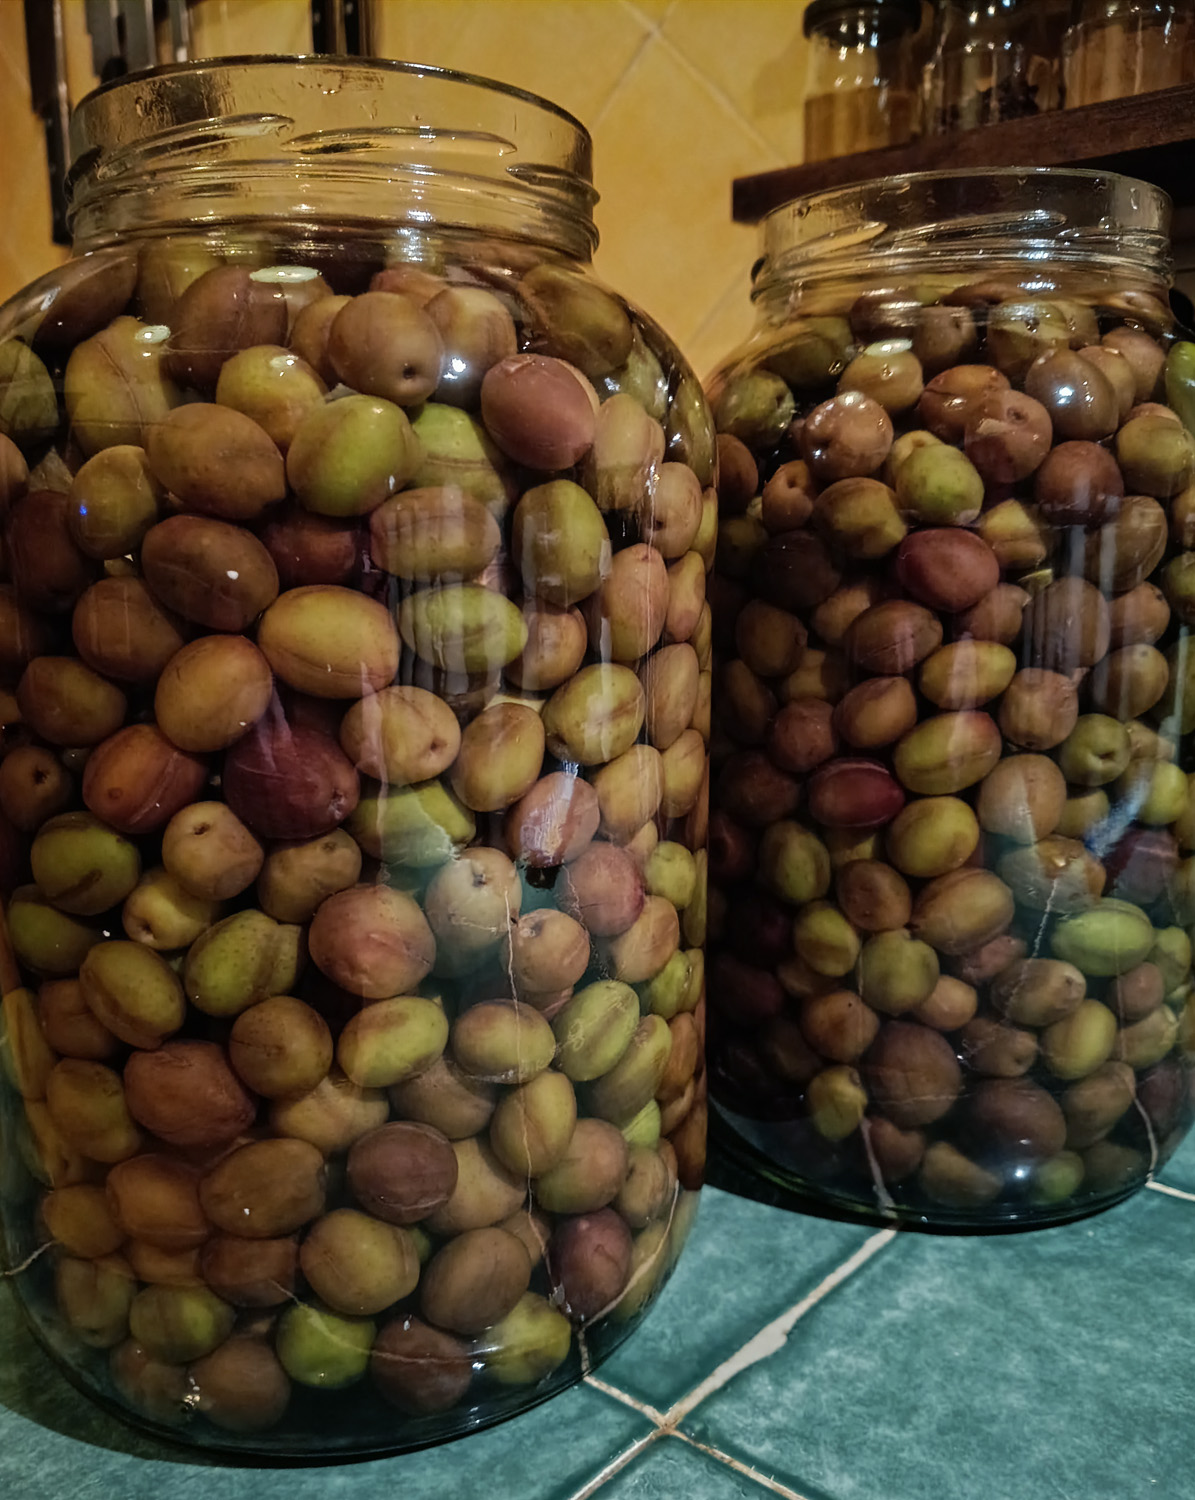
Step 4: Washed & brined olives can sit in a cool, dark place for several months as long as there’s no evaporation of the salt solution. I put a small amount of olive oil on top, seal the jar, then cover tightly with plastic wrap as extra insurance. Those 2 kilos of manzanilla olives translated into two 4-liter jars that currently sit in our outside patio storage space.
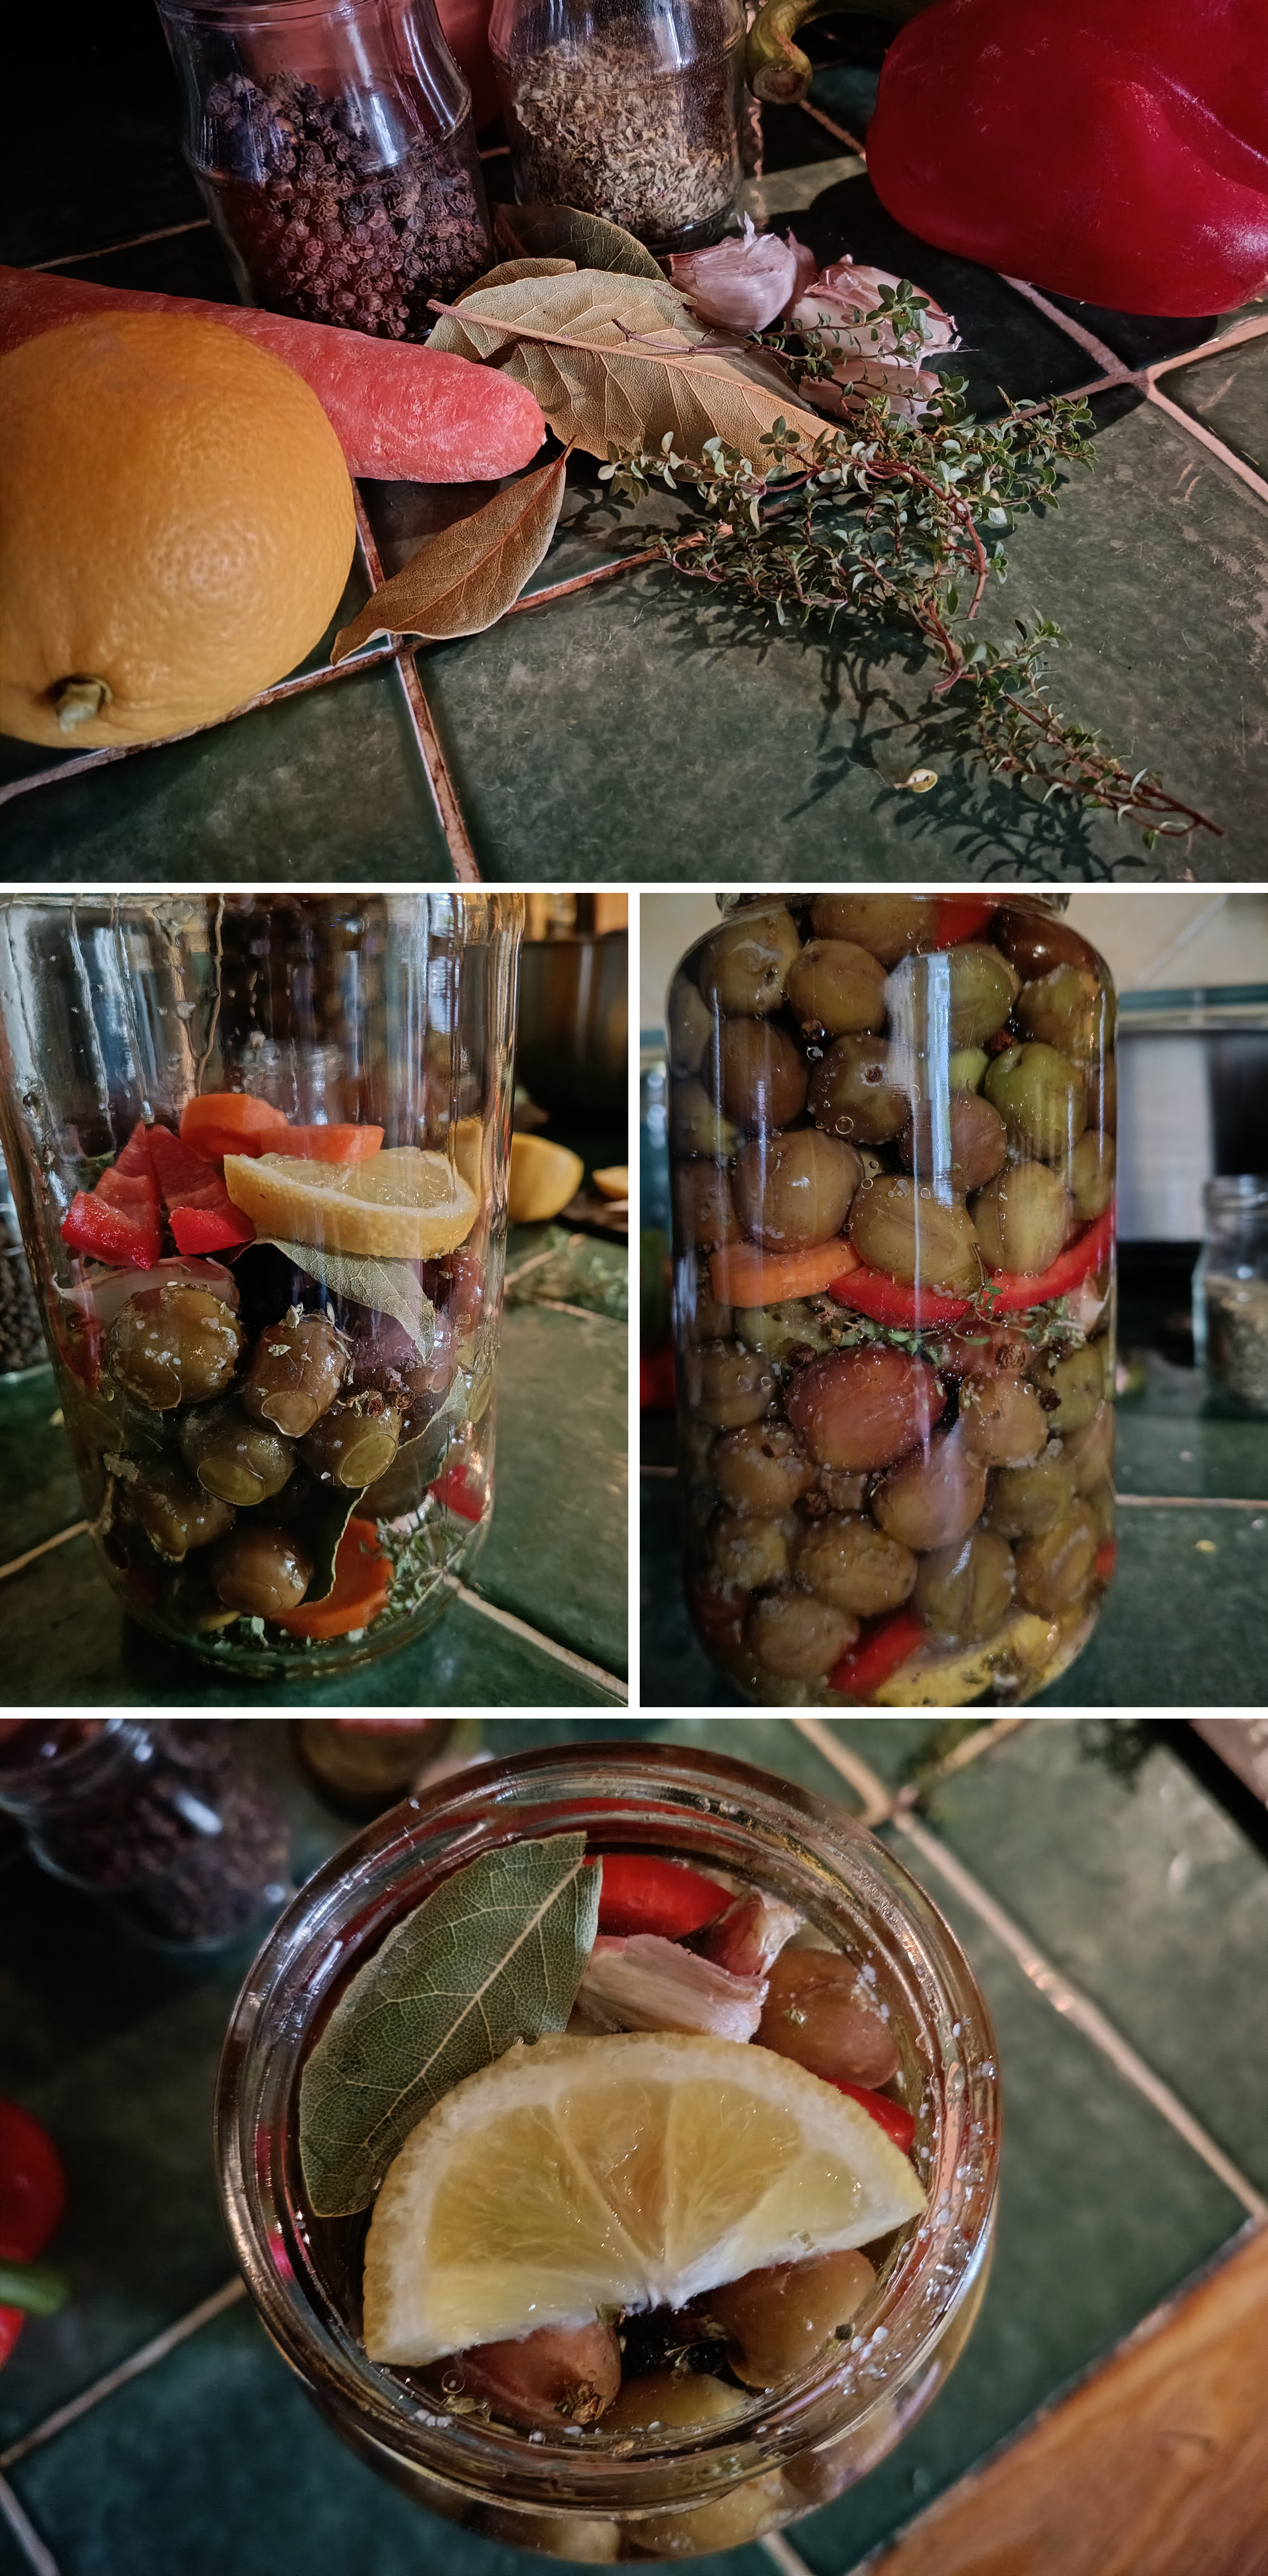
I start saving used glass containers at this point —from garbanzos, lentils or even spicy guindillas— to reuse for this final step. Great news! Jars don’t need the extra work of sterilization because salt prohibits the growth of microorganisms. Now all the hard work begins to pay off by adding whatever flavors you like best. But first make a new brine that’s only as salty as your taste buds like. You do you. Then layer in that flavor.
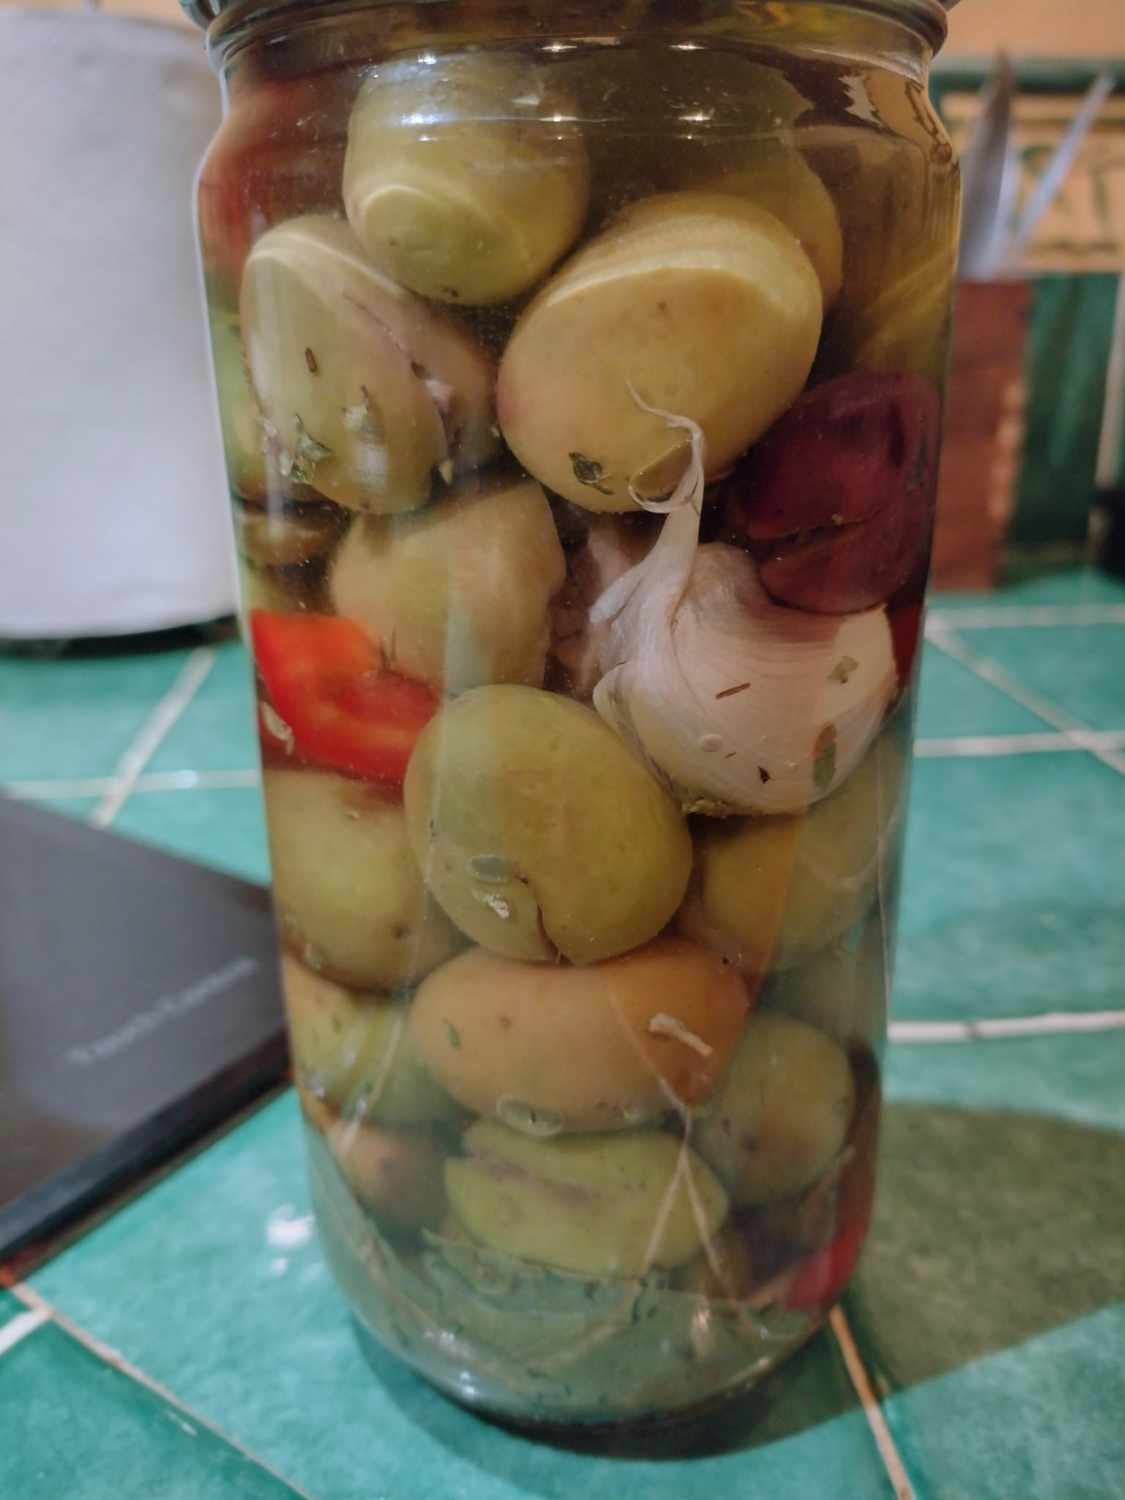
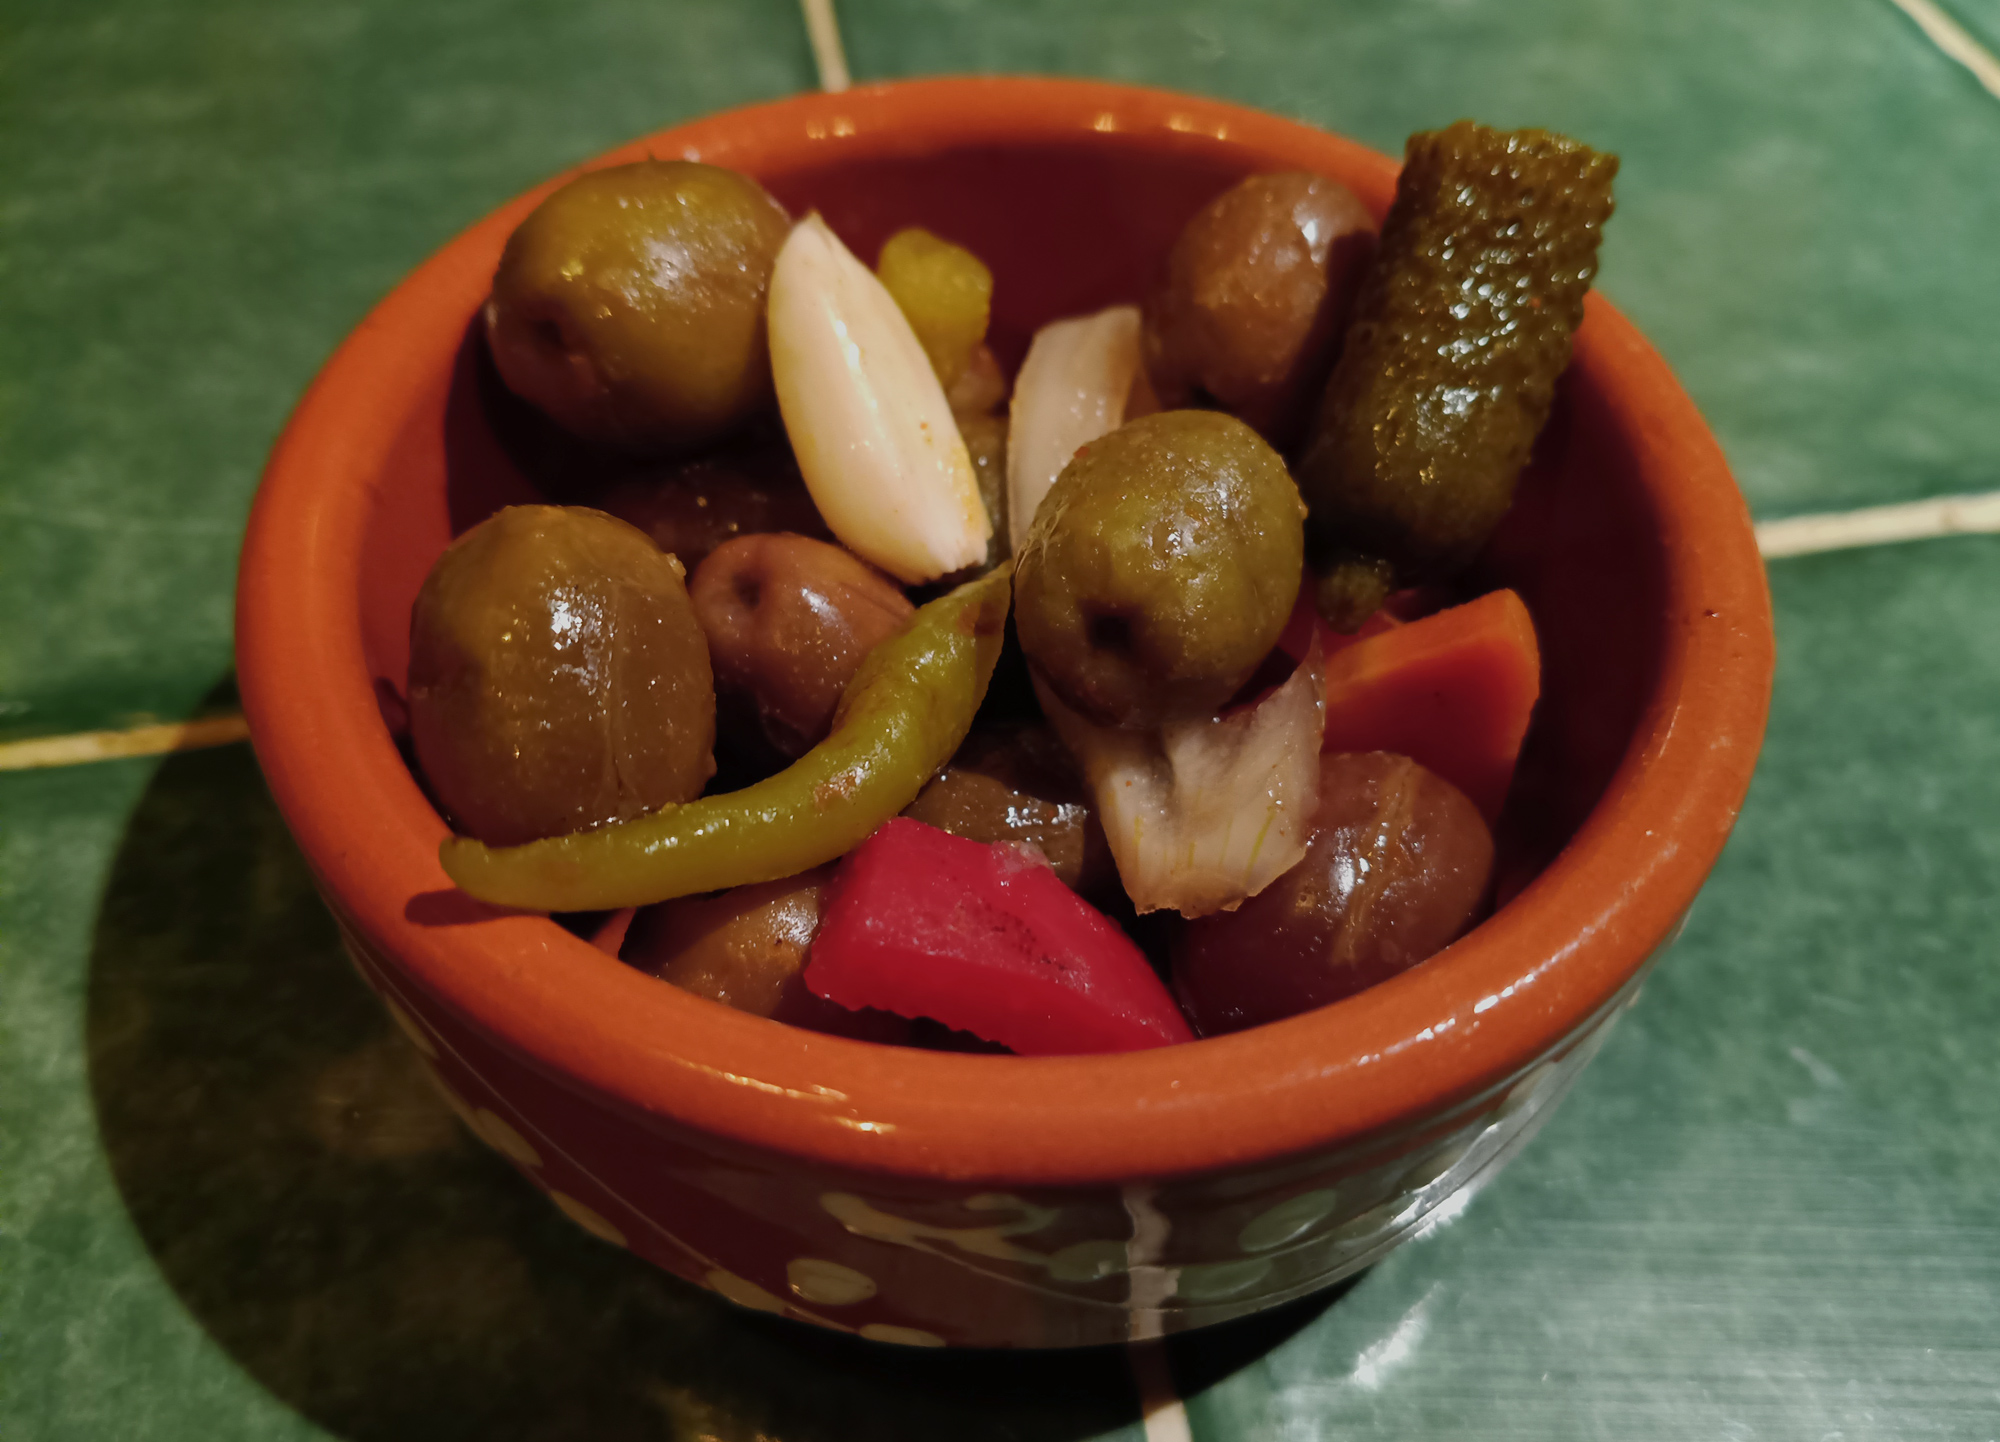
A traditional mix that we enjoy includes: red pepper, garlic (peeled or not), carrot, lemon wedges, bay leaves, a touch of sherry or Pedro Ximénez vinegar, black peppercorns & thyme. Place in alternating layers, starting with small amounts of the above ingredients. Then fill to the middle of the jar with olives. Add another level of flavor bits, fill almost to the top with olives, then stuff whatever you like on top. To finish, pour in the less salty brine almost to the rim, drizzle with a little olive oil, screw on the cap & place in the fridge for 1-2 weeks. They really do get better the longer you leave them, & I find the slightly pickled veggie bits just as tasty as the olives themselves.
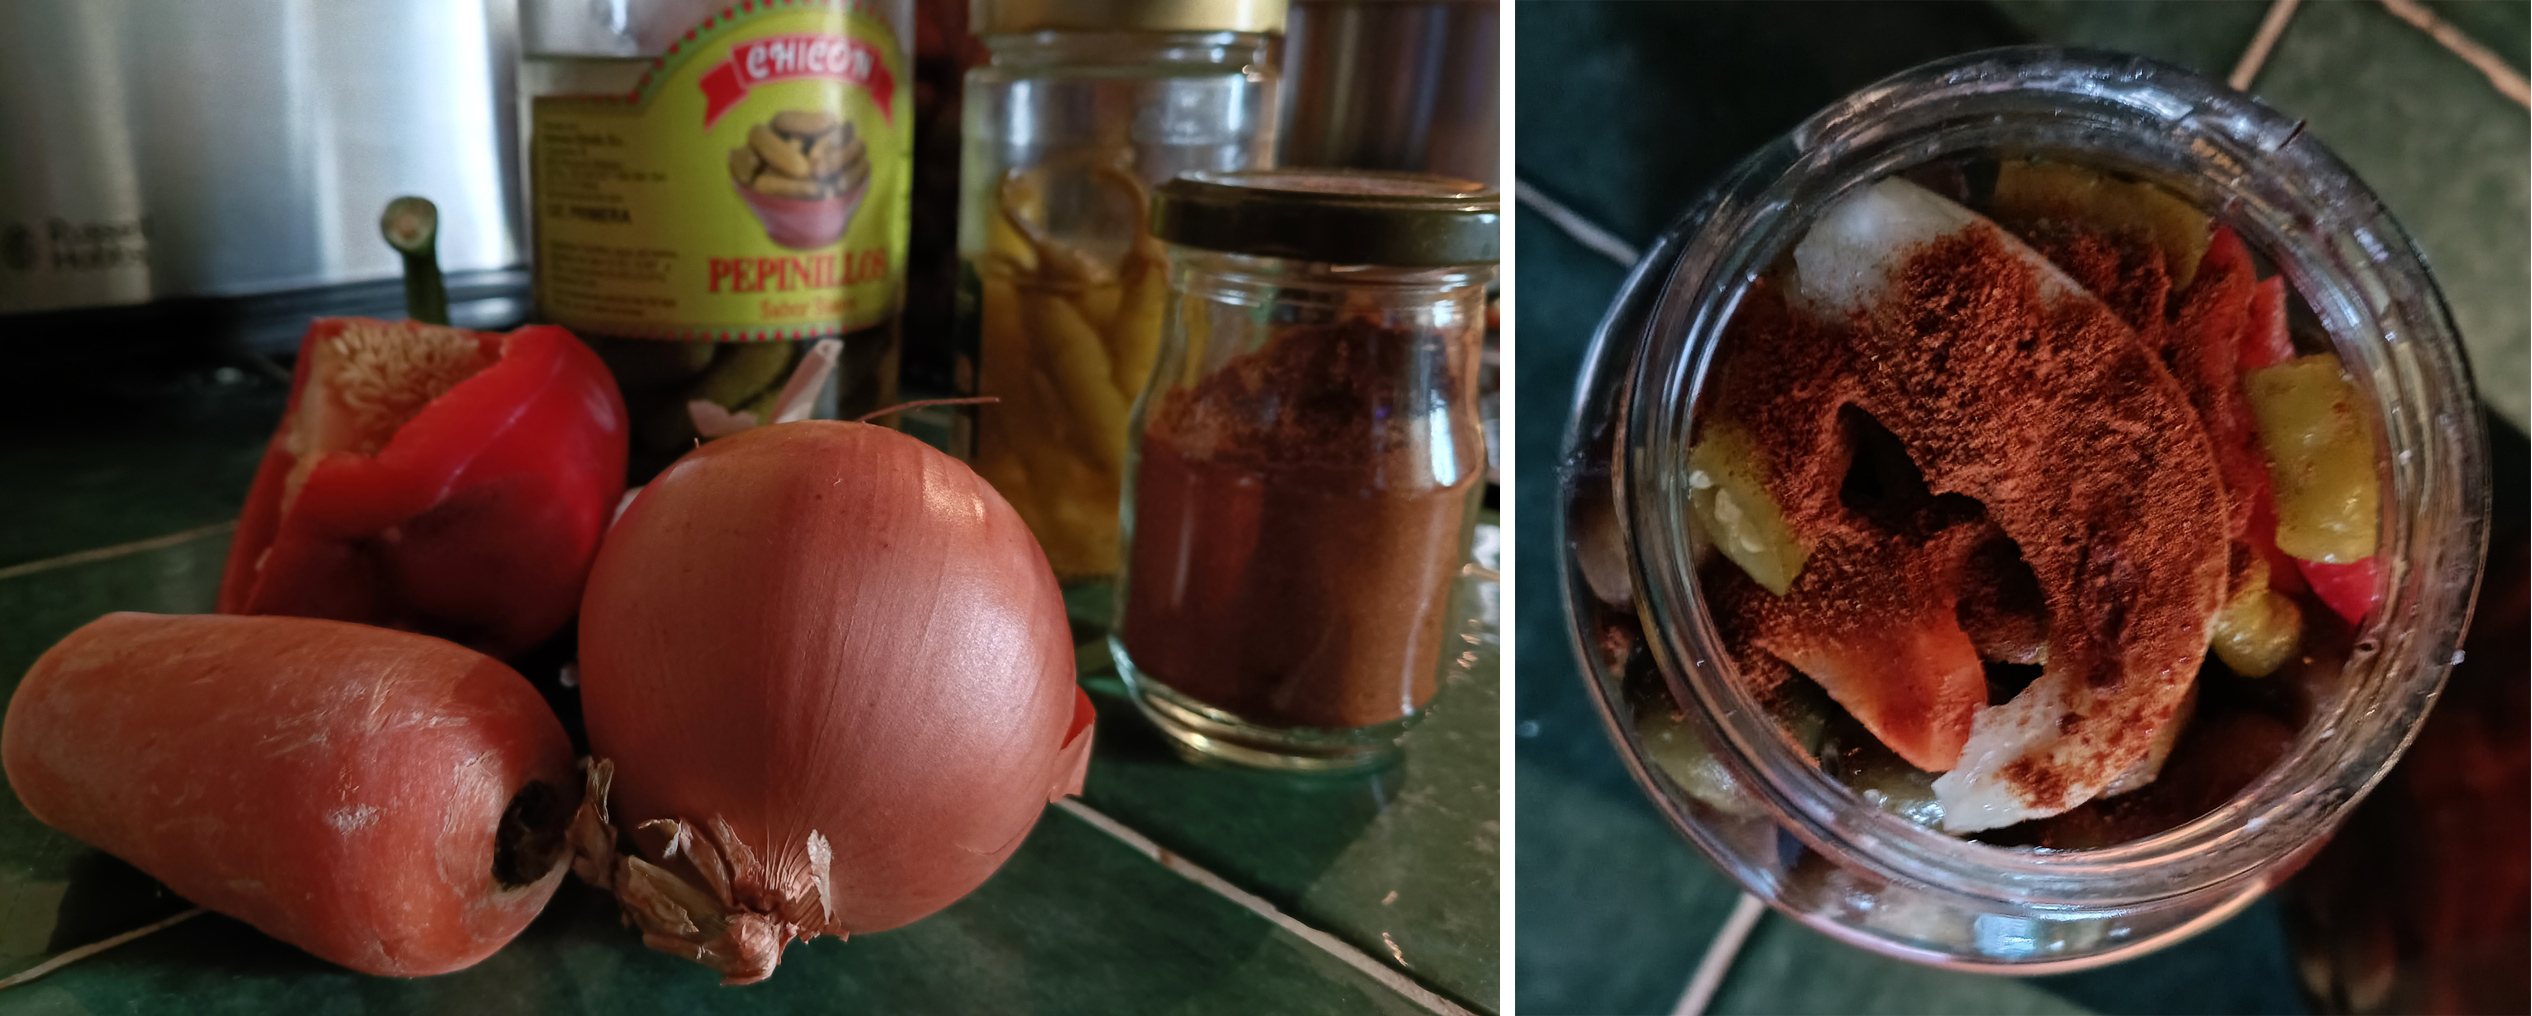
Another classic mix of flavors goes by the name gazpacha. Use slices of red pepper, garlic, onion & carrot, along with small pieces of pickles, spicy green guindillas & a tablespoon or so of pimentón/paprika in each layer. I often find that commercial versions go way too heavy on the paprika, at the expense of drowning out other flavors. In fact, Rafa said that this batch was perfect because they tasted made just for us. Indeed, they were!
If I had access to fennel, that would be fantastic. Guille Rodríguez has a version with Asian flavors that could be interesting to try. Your imagination is the limit, just keep in mind the play between salt, sweet, sour & bitter. As I try new combos, I’ll post them below. Do you have a favorite addition? Leave a comment below. ¡Qué aproveche!